 ultimate-guide
Smart Home Security Integration for Beginners
Table of Contents
- What Smart Home Security Integration Actually Means for Beginners
- Core Components You Need Before Integrating Anything
- How to Prevent Door Kick-Ins with Smart Integration
- DIY Home Security System Installation: What Beginners Can Handle
- Best Smart Home Security Hubs for First-Time Integrators
- Interoperability Protocols: Matter, Thread, Zigbee, and Z-Wave Explained
- Cybersecurity Hygiene for Beginners: Protecting Your Smart Home Network
- Troubleshooting Common Smart Home Integration Conflicts
- Frequently Asked Questions
Last Updated: September 10, 2026
What Smart Home Security Integration Actually Means for Beginners
Smart home security integration is the practice of connecting door sensors, cameras, locks, and alarms into one system you control from a single app, so each device can trigger the others. For beginners, that means your video doorbell can tell your smart lock to stay engaged when motion is detected at 2 a.m. This guide from Door Armor breaks down the architecture, the protocols, and the practical steps, because most guides skip straight to product lists and leave you guessing how the pieces actually talk to each other.
The payoff is real. A connected system gives you real-time notifications, remote access, and automation that reacts without you lifting a finger.
Core Components You Need Before Integrating Anything
Every integrated system rests on three layers: a hub that coordinates, sensors that detect, and locks or cameras that act. Skip any layer and your automation has nothing to trigger or nothing to trigger it.
The Hub: Your System's Brain
The hub is the device that receives signals from your sensors and sends commands to your locks, lights, and sirens. It runs your if-then logic locally or in the cloud. Without a hub, each device operates alone and you lose the automation that makes integration worth the effort.
Sensors, Cameras, and Smart Locks
- Contact sensors on doors and windows report open and closed states
- Motion detectors catch movement inside or on your porch
- Video doorbells add two-way talk and motion-triggered recording
- Smart locks let you lock, unlock, and grant keypad access remotely
- Cameras handle surveillance and feed clips to cloud storage or local storage
How to Prevent Door Kick-Ins with Smart Integration
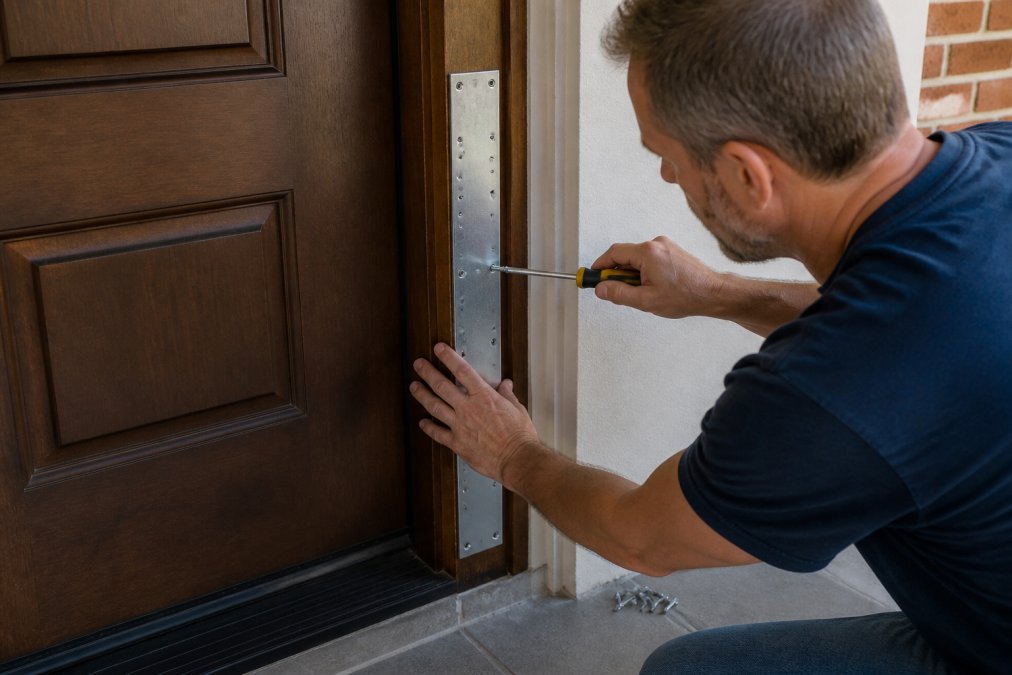
A smart lock and camera notify you after someone forces a door. Reinforcement stops the door from giving way in the first place. Pair the two and you cover both the alarm and the physical barrier.
Most forced entries target the door frame, not the lock cylinder. A kick concentrates force on the strike plate and hinge side, which is why a deadbolt alone often fails. Door Armor's patented galvanized steel system reinforces those exact weak points, installs in under 30 minutes, and carries a $500 Lifetime Guarantee against kick-ins. Pair it with a door sensor and you get an alert the moment the door is disturbed, plus the time you need to call for help.
DIY Home Security System Installation: What Beginners Can Handle
DIY home security system installation covers everything from peel-and-stick sensors to battery-powered cameras and door reinforcement kits. No wiring, no contractor, and no monthly contract required for the hardware itself. What it does require is a sequence. Install in the wrong order and you will spend a weekend re-pairing devices instead of testing automations.
The Right Order of Operations
- Set up the hub first. Plug it in, connect it to your Wi-Fi or Ethernet, and finish the app onboarding before you touch a single sensor. The hub is the network every other device joins.
- Place the hub centrally. A hub in a basement corner will drop signals from second-floor sensors. Put it near the middle of the home, off the floor, and away from metal appliances and microwaves.
- Pair one device at a time. Add a sensor, confirm it shows online in the app, then move to the next. Pairing five devices at once makes it impossible to tell which one failed.
- Mount after pairing, not before. Adhesive mounts are hard to reposition. Confirm the device reports correctly from its intended spot before you commit it to the wall.
- Reinforce exterior doors. Door frames, strike plates, and hinges are the weak points a kick targets. Reinforcement hardware installs with a screwdriver and takes under 30 minutes per door.
- Build three automations and test each one. Start simple: motion at the front door turns on the porch light; door opens while armed sends a push alert; lock engages when everyone leaves.
- Add a keypad last. A keypad is an entry method, not a sensor. It only matters once the rest of the system is stable.
A Realistic Weekend Checklist
- Mount contact sensors on every exterior door and ground-floor window
- Install a video doorbell and connect it to your Wi-Fi
- Set up the hub and pair each device in the app, one at a time
- Reinforce door frames at the strike plate and hinges
- Create three automation rules and test them manually
- Add a keypad for code-based entry
- Walk the perimeter and confirm every sensor reports
Tools and Skills You Actually Need
You need a Phillips-head screwdriver, a drill for reinforcement plates, a step ladder, and a phone with the hub's app installed. You do not need low-voltage wiring experience, a network closet, or a contractor. The skills that matter are patience with pairing and willingness to read the app's error messages instead of guessing.
Where Beginners Get Stuck
- The sensor will not pair. Nine times out of ten it is a protocol mismatch or a battery still wrapped in plastic. Check the protocol on the box, then check the battery tab.
- The device pairs but drops offline. This is a range problem, not a device problem. Move the hub closer or add a mesh node between them.
- The automation fires but nothing happens. The rule is probably pointing at the wrong device or the wrong state. Open the rule and confirm the trigger and the action reference the exact devices you think they do.
- Two rules fight each other. If a light turns on and immediately off, you likely have two automations controlling the same device. Delete the overlapping rule.
Best Smart Home Security Hubs for First-Time Integrators
A hub is the traffic controller of your system. It receives a radio signal from a sensor, runs your if-then rule, and fires a command to a lock, light, or siren. The hub you pick decides which devices you can add later, whether your automations keep running when the internet drops, and how many apps you have to open to arm the house.
For a first integration, judge a hub on five things, in this order:
- Protocol support. Does it speak Matter, Thread, Zigbee, Z-Wave, or Wi-Fi? A hub that only speaks one protocol locks you into one brand's catalog.
- Local vs. cloud processing. A hub that runs automations locally keeps working during an internet outage. A cloud-only hub does not.
- App quality. You will live in this app. Look for clear device pairing, rule building, and notification controls.
- Ecosystem fit. If your household already uses a major voice assistant or phone platform, pick a hub that integrates natively rather than through a third-party skill.
- Expansion headroom. Count the device limit. A hub capped at 30 devices will run out fast once you add sensors to every window.
| Hub Type | Protocol Support | Best For | Watch Out For |
|---|---|---|---|
| Matter/Thread hub | Matter, Thread, Wi-Fi | Future-proofing a new setup; local control | Fewer legacy devices supported |
| Zigbee/Z-Wave hub | Zigbee, Z-Wave | Large sensor networks; mature device catalogs | Needs a separate bridge for Matter |
| Brand-locked hub | Proprietary | Single-ecosystem homes; simplest setup | Poor cross-brand compatibility |
| Hybrid hub | Matter, Thread, Zigbee, Z-Wave | Mixed-device homes; one app for everything | Higher upfront cost; more complex setup |
How to Match a Hub to What You Already Own
Before you buy, walk your home and inventory every smart device you have. Write down the brand and the protocol printed on the box or in the app's device settings. Then apply this rule: the hub must support every protocol in your inventory, or you must be willing to replace the devices it cannot reach.
A common beginner mistake is buying a cheap hub first and discovering later that it cannot see the Zigbee sensors already mounted on the windows. Re-pairing does not fix a radio mismatch. The hub either has the radio or it does not.
Local Control vs. Cloud Control
Local control means the hub runs your automations on the device itself. If your internet goes down, your motion-triggered lights and door alerts still fire. Cloud control means the hub sends every event to a server and waits for a response. It is simpler to set up and often cheaper, but it stops working when your connection does.
For a security system, local control is the safer default. Most practitioners recommend a hub that can run core automations locally and fall back to the cloud only for remote access and video storage.
Matter in 2026: What It Changes for Beginners
Matter is the cross-brand interoperability standard backed by the major smart home platforms. Its promise is simple: a Matter-certified device from one brand should work in another brand's app without a proprietary bridge. Thread is the low-power mesh network that often carries Matter traffic, which reduces latency and extends range through device-to-device hops.
What Matter does not do is make every old device compatible. Legacy Zigbee and Z-Wave devices still need their original hub or a bridge. If you are starting fresh, buy a Matter-and-Thread hub first and add legacy devices only when you have a specific reason to.
Interoperability Protocols: Matter, Thread, Zigbee, and Z-Wave Explained
Interoperability protocols are the languages your devices use to communicate, and picking compatible ones is the single biggest decision you make before buying anything.
- Matter is the newer cross-brand standard that lets devices from different manufacturers work in one app
- Thread is a low-power mesh network that carries Matter traffic and reduces latency
- Zigbee is a mature mesh protocol with a huge device catalog but needs a compatible hub
- Z-Wave runs on a separate radio frequency, which limits interference but requires its own hub
A common mistake is mixing protocols without checking the hub. A Zigbee sensor will not talk to a Z-Wave-only hub, no matter how many times you re-pair it. Check the protocol on the box before you buy.
Cybersecurity Hygiene for Beginners: Protecting Your Smart Home Network
Cybersecurity hygiene for a smart home starts with three habits: change default passwords, keep firmware updated, and put your devices on a separate network. Encryption and data privacy settings matter as much as the hardware.
A separate Wi-Fi network for your cameras and hubs keeps a compromised device from reaching your laptop. Enable two-factor authentication wherever the app offers it, and turn on encryption for cloud storage. Review each app's data privacy settings and disable anything that shares footage or usage data you did not agree to. As the Federal Trade Commission's guidance on securing smart devices notes, default credentials are one of the most common ways home networks get breached.
Troubleshooting Common Smart Home Integration Conflicts
Most integration conflicts trace back to one of four causes: protocol mismatch, weak connectivity, outdated firmware, or a duplicate automation rule fighting another. Work through them in that order.
| Symptom | Likely Cause | Fix |
|---|---|---|
| Device won't pair | Protocol mismatch | Confirm hub supports the device's protocol |
| Commands arrive late | Weak connectivity | Move hub closer or add a mesh node |
| Automation fires twice | Duplicate rules | Delete overlapping rules in the app |
| Device drops offline | Outdated firmware | Update firmware and re-pair |
Latency usually points to connectivity, not the device. If a lock responds slowly, check the signal between it and the hub before you replace anything. For broader guidance on securing entry points, the National Crime Prevention Council's home security resources is a solid starting point.
Smart home security integration only delivers when the physical door holds long enough for your sensors and cameras to do their job. A camera that records a break-in is not the same as a door that resists one. Door Armor reinforces the weak points of your existing doors with a patented galvanized steel system, installs in under 30 minutes, and backs it with a $500 Lifetime Guarantee against kick-ins. Get started with Door Armor and give your connected system the time it needs to protect what matters.
Frequently Asked Questions
What is the easiest home security system to set up for beginners?
Systems with a single hub and wireless sensors are easiest. Look for one that uses Zigbee or Z-Wave and has a mobile app with guided setup. Many hubs pair devices automatically when you press a button. If you want to avoid wiring entirely, choose battery-powered sensors and smart locks that communicate wirelessly. Many hubs can get you started in under an hour.
Can I connect my existing door security to a smart home hub?
Yes, if your existing door hardware is compatible with a smart hub. Many smart locks and door sensors use Z-Wave or Zigbee and can be paired with compatible hubs. For non-smart doors, you can add a smart lock or a door/window sensor. Physical reinforcement like Door Armor works alongside smart devices, adding kick-in protection that sensors alone cannot provide.
Do I need a professional to install smart security integrations?
Most beginner-friendly smart home security devices are designed for DIY installation. Smart locks, sensors, and hubs typically require only a screwdriver and a smartphone. However, if you are adding wired cameras or integrating with an existing alarm panel, a professional may be needed. For door reinforcement, products like Door Armor install in under 30 minutes with basic tools.
How do I integrate different smart security brands into one app?
Use a hub that supports multiple protocols. These hubs can connect to Zigbee, Z-Wave, and Wi-Fi devices from various brands. Matter-certified devices are also becoming more common and work across ecosystems. Check the hub's compatibility list before buying devices. Some brands also offer their own app integrations, but a central hub simplifies control.