 ultimate-guide
Preventing Forced Entry on Wooden Doors: A Complete Guide
Table of Contents
- Why Wooden Doors Fail Against Forced Entry
- How to Reinforce Front Door Frame: The 3 Critical Weak Points
- Door Strike Plate Reinforcement: Upgrading Your Screws and Hardware
- Best Door Security Devices for Home: From Bars to Full Systems
- Installing Door Armor: A Step-by-Step DIY Upgrade
- Smart Locks, Aesthetics, and Other Angles Competitors Miss
- Conclusion: Build a Real Defense Against Kick-Ins
- Frequently Asked Questions
Last Updated: September 9, 2026
Why Wooden Doors Fail Against Forced Entry
Most break-ins don't involve picking locks or breaking glass. The most common method of forced entry is a simple, violent kick aimed at the area around the deadbolt. According to the FBI's Uniform Crime Reporting data on burglary, the majority of residential burglaries involve forcible entry, and law enforcement consistently points to the door frame as the weakest link in home defense.
The problem isn't the door itself. It's the hollow wood jamb and the flimsy strike plate that hold the deadbolt in place. A solid wood door is strong, but the lock only anchors into roughly one inch of soft pine. When a burglar kicks near the lock, the force transfers through the bolt and splits the jamb clean apart. The door survives; the frame does not.
Understanding this changes how you approach security. You don't need a vault door. You need to reinforce the points where the door meets the frame so the whole assembly absorbs the impact. This guide walks through exactly how to reinforce front door frame weak points, upgrade your strike plate, and choose the best door security devices for home use.
How to Reinforce Front Door Frame: The 3 Critical Weak Points
Forced entry resistance comes down to three vulnerable areas on any wooden entry door: the strike plate region, the hinge side, and the gap above the lock where pry bars get inserted. Each one fails differently, but they all share a common cause: the wood jamb is soft and the hardware screws are too short.
The strike plate area absorbs the deadbolt's force during a kick. Standard strike plates come with screws that bite only half an inch into the jamb. The hinge side is equally exposed; long hinge screws can anchor the door to the wall stud, but most homes use short screws that pull out under stress. The pry point above the lock is where burglars insert a crowbar to spread the frame.
The Door Jamb and Strike Plate Problem
A typical door jamb is made of soft wood, often pine or finger-jointed material, which offers minimal kick-in resistance on its own. When a burglar kicks, the bolt slams against the strike plate, and the short screws rip through the wood fibers. The structural integrity of the entire entry point collapses in one or two attempts.
The fix requires transferring the force from the soft jamb into the solid wall framing behind it. This is the core principle behind door frame reinforcement: you need hardware that reaches past the jamb and into the 2x4 studs that actually hold your house together. Long screws alone help, but metal plates that bridge the gap between the lock and the stud provide the real defense.
Door Strike Plate Reinforcement: Upgrading Your Screws and Hardware
Door strike plate reinforcement is the single highest-impact upgrade you can make for under $20 in materials. The goal is simple: replace the tiny screws with 3-inch or 4-inch hardened steel screws that penetrate through the jamb and into the wall stud. This small change dramatically increases pry resistance because the force now spreads across the entire wall structure.
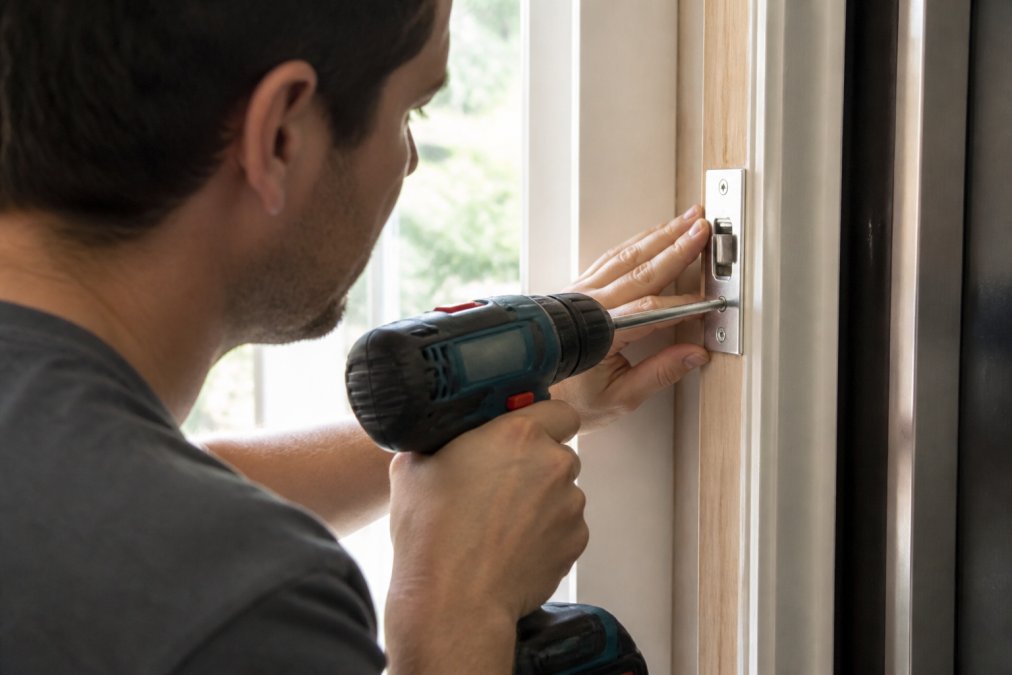
Understanding the Anatomy of the Failure Point
A standard residential door jamb is constructed from softwood, typically pine, spruce, or finger-jointed material, that measures roughly 3/4-inch thick. Behind that jamb sits a gap, often filled with shims, and then the actual wall stud, which is a 2x4 or 2x6 piece of dimensional lumber. The stud is the structural member that carries the load of your house; the jamb is essentially cosmetic trim.
A standard strike plate comes with two screws, usually #8 by 1/2-inch or 3/4-inch long. Those screws only bite into the softwood jamb. When a burglar kicks the door, the deadbolt transfers force to the strike plate, and those short screws act like levers, splitting the wood fibers along the grain. The jamb cracks, the plate pops off, and the bolt is free to slide out of the opening. The entire failure happens in under a second.
The fix is to bypass the jamb entirely. You need screws long enough to reach through the jamb, through the shim space, and deep into the wall stud. This is called 'stud anchoring,' and it is the difference between a lock that resists a firm push and one that withstands repeated violent kicks.
Selecting the Right Screws: Metallurgy Matters
Not all long screws are created equal. Choosing the wrong ones will leave you with a false sense of security. Here is what to look for:
- Material: Look for case-hardened steel or through-hardened steel. These screws are heat-treated to resist bending and shearing. Standard zinc-plated drywall screws or deck screws are brittle and will snap under the sudden impact of a kick.
- Head type: Choose pan-head or flat-head screws with a Phillips or Torx drive. Torx (star) drive is preferable because it resists cam-out, meaning the drill bit is less likely to slip and strip the head when you are driving into dense wood.
- Length: 3 inches is the minimum for reaching the stud on a standard 2x4 wall assembly. 3.5 inches or 4 inches provide even more bite. Measure your jamb depth if you have an older home with thicker framing.
- Gauge: #9 or #10 gauge screws are the sweet spot. They are thick enough to resist shearing forces but not so thick that they are difficult to drive or prone to splitting the stud.
- Coating: A corrosion-resistant coating, such as zinc or a proprietary anti-rust finish, is essential for exterior doors exposed to humidity and temperature swings.
The Installation Process: Step-by-Step
- Remove the existing strike plate. Use a Phillips or flat-head screwdriver to remove the two short screws. Set them aside; you will not be reusing them.
- Inspect the jamb. Look for signs of previous damage, such as cracks, splits, or areas where the wood feels soft when pressed with a screwdriver. If you find damage, repair it before proceeding (see the section on wood integrity below).
- Choose your replacement plate. A standard plate is fine, but a larger plate distributes force over a wider area. Look for a plate made of case-hardened steel, not soft brass or zinc alloy. The plate should have at least four screw holes, not just two.
- Position the new plate. Align it with the deadbolt opening. Ensure the bolt slides freely through the hole. If the hole is misaligned, the bolt will bind, and you will have to adjust the plate position.
- Mark the screw holes. Use a pencil or an awl to mark the center of each hole on the jamb.
- Pre-drill pilot holes. This step is non-negotiable. Use a drill bit that is slightly smaller than the core diameter of your screw (about 1/8-inch for a #9 screw). Drill straight into the jamb, going through the shim space and into the stud. The pilot hole prevents the wood from splitting and makes driving the long screw significantly easier. Drill to the full depth of the screw.
- Drive the screws. Use a drill with a clutch set to a medium torque, or use a hand screwdriver for maximum control. Drive each screw firmly until the head is snug against the plate. Do not overtighten; you will strip the threads in the wood or deform the plate.
- Test the door. Close the door and engage the deadbolt. The bolt should slide smoothly into the plate opening. Give the door a firm push to check for any play.
Beyond the Strike Plate: The Jamb Shield Upgrade
A longer screw upgrade is a massive improvement over the factory install, but it still concentrates force on a single point. For maximum protection, consider a metal jamb shield that wraps around the strike plate area. These shields, typically made of 14-gauge or 16-gauge galvanized steel, distribute the force of a kick across a much wider surface of the jamb and the stud.
Systems like the Door Armor Single Door Security Set use a patented galvanized steel plate that covers the lock area and hinge points, anchoring deep into the framing with multiple long screws. The shield spreads the impact load so no single screw bears the brunt of the force. This is the difference between a door that survives one strong kick and one that survives a sustained, repeated assault.
The Cost-Benefit Analysis
For roughly $10 to $20 in materials, a box of four hardened steel screws and a heavy-duty strike plate, you can upgrade your front door from a 'pushover' to a 'serious obstacle.' This is a high return on investment for a home security measure. An upgrade can prevent a break-in that costs thousands in stolen property and hundreds in door and frame repairs.
Best Door Security Devices for Home: From Bars to Full Systems
The best door security devices for home use fall into three categories: simple screw upgrades, mechanical bars and braces, and full reinforcement systems. Each tier offers a different balance of cost, installation effort, and kick-in resistance.
| Device Type | Best For | Installation | Protection Level |
|---|---|---|---|
| Long screws + heavy strike plate | Budget-conscious DIYers | 15 minutes | Moderate |
| Door brace / security bar | Renters, temporary setups | 5 minutes, no tools | Moderate |
| Full jamb reinforcement system | Homeowners wanting real defense | 30 minutes | High |
Door braces and security bars wedge between the door and the floor, providing solid resistance against kicks. They are portable and require no permanent changes, making them a strong option for renters. However, they sit visibly in the room and can be a tripping hazard.
For permanent protection, a full reinforcement kit addresses every weak point simultaneously. Door Armor's system covers the lock, the hinges, and the strike plate with continuous steel. It installs in under 30 minutes with basic tools and includes a $500 Lifetime Guarantee against kick-ins. The galvanized steel construction provides 24/7 protection without relying on batteries or power, and the discreet design matches your existing hardware so your home doesn't look like a fortress.
Installing Door Armor: A Step-by-Step DIY Upgrade
Installing a complete reinforcement system is a straightforward afternoon project. The Door Armor kit includes pre-drilled steel plates, all necessary hardware, and clear instructions. Here is the general process:
- Remove the existing deadbolt, strike plate, and hinge screws.
- Position the steel strike plate shield over the jamb and secure it with the provided long screws, driving them into the wall stud.
- Attach the hinge shields over the existing hinges, replacing the short screws with the long ones included in the kit.
- Reinstall the deadbolt and test the door to ensure it closes and locks smoothly.
The entire process typically takes about 30 minutes. The most common mistake is rushing the screw alignment. Take your time to ensure each plate sits flush against the wood. A properly installed system shows no visible gap between the steel and the jamb.
Smart Locks, Aesthetics, and Other Angles Competitors Miss
Most hardware guides ignore the interaction between reinforcement and smart locks. A smart lock is only as secure as the strike plate it anchors to. Many homeowners install a smart lock on a frame that could be kicked through. Reinforce the jamb first, then add the smart features. The mechanical security must come before the electronic convenience.
Smart Lock Integration: The Digital Attack Surface
The rise of smart locks has introduced a new set of vulnerabilities that purely mechanical guides overlook. A smart lock replaces the physical key cylinder with an electronic actuator, but the deadbolt itself still extends into the same strike plate and jamb. If the jamb is weak, the electronic lock's motorized bolt is just as easy to defeat with a kick as a traditional deadbolt. In fact, some smart locks use a thinner bolt to accommodate the motor, which can make them marginally weaker under impact.
Beyond the physical kick-in risk, smart locks introduce a digital attack surface. Most smart locks communicate over Bluetooth, Wi-Fi, or Z-Wave. Security researchers have demonstrated relay attacks on Bluetooth Low Energy (BLE) locks, where an attacker intercepts the signal from your phone and replays it to unlock the door. Other potential vulnerabilities include:
- Bypass via the physical backup key: Many smart locks include a traditional key cylinder as a fallback. If you do not reinforce that cylinder, an attacker can pick it or use a bump key.
- Firmware exploits: Like any connected device, smart locks receive firmware updates. A lock that is not updated may have known vulnerabilities that can be exploited remotely.
- Power failure: If the lock runs on batteries and they die, you may be locked out. Most locks have a physical backup, but if you are not prepared, you could be stuck outside, which is a security risk in itself.
- Data privacy: Your lock's app may log when you come and go. If that data is not encrypted or if the cloud service is breached, a burglar could learn your schedule.
The practical takeaway is not to avoid smart locks, but to layer your security. A smart lock should be treated as a convenience feature, not as your primary defense. The reinforced strike plate and jamb are what stop a physical attack. The smart lock's job is to manage access and alert you to activity. Install your reinforcement first, then add the smart lock on top. When choosing a smart lock, look for one that uses a standard deadbolt form factor, so you can pair it with a heavy-duty strike plate and long screws. Avoid models with proprietary bolt designs that cannot be reinforced with standard hardware.
Aesthetic-Conscious Reinforcement: Security Without the Fortress Look
Aesthetic concerns stop many people from upgrading. The fear of a door that looks like it belongs on a bank vault is real, and it is a primary reason homeowners delay security improvements. The good news is that reinforcement no longer requires industrial-looking metal strapped across your door. Modern kits are designed with curb appeal in mind.
Here is what to look for if aesthetics are a priority:
- Finish matching: High-end reinforcement kits are available in satin nickel, oil-rubbed bronze, polished brass, and matte black. These finishes match standard Schlage, Kwikset, and Baldwin hardware lines, so your new plates blend seamlessly with your existing door handle and deadbolt.
- Low-profile design: The steel plates sit behind the existing lock and hinges, visible only as slightly larger backplates. From a distance of a few feet, they are nearly indistinguishable from standard hardware.
- Color-matched screws: The included screws are finished to match the plates, eliminating the visual distraction of mismatched silver screws against dark bronze hardware.
- Interior vs. exterior visibility: The most visible parts of a reinforcement system are on the interior side of the door. If you are concerned about the look from the street, focus on the exterior finish. On the inside, you can be more flexible, as guests are less likely to scrutinize the hinge side of the door.
Your wood door keeps its character while gaining real structural strength. A well-installed reinforcement system is a subtle upgrade that only a trained eye will notice. The curb appeal of your home is preserved, and you gain the peace of mind that comes with knowing the door is not the weakest point in your security perimeter.
Wood Integrity: The Foundation of Any Security Upgrade
Wood integrity matters more than most people realize. If your door or jamb has water damage, rot, or previous break-in repairs, no amount of steel will hold. The screws need solid wood to bite into. Before installing any reinforcement, check the jamb for soft spots and replace damaged wood first. This maintenance step ensures your security upgrade actually works when it matters.
How to Inspect Your Door and Jamb for Structural Decay
A quick inspection takes less than five minutes and can save you from installing expensive hardware on a failing foundation. Here is a simple checklist:
- Visual inspection: Look at the bottom of the door and the jamb, especially near the threshold. Water damage often shows as discoloration, bubbling paint, or a darkened appearance. Check the corners where the jamb meets the floor.
- The screwdriver test: Take a flat-head screwdriver and gently press the tip into the wood at several points along the jamb, particularly near the strike plate and the hinges. Healthy wood is firm and resists the pressure. If the screwdriver sinks in easily, or if the wood feels spongy or crumbly, you have rot or insect damage.
- Check the door edge: The edge of the door itself can also rot, especially at the bottom. Press the screwdriver into the bottom edge of the door. If it sinks in, the door's core is compromised.
- Look for previous repairs: If you see wood filler, putty, or a patch that looks different from the surrounding wood, it may be hiding damage. Probe these areas carefully.
- Check the hinge mortises: Remove one screw from a hinge and inspect the hole. If the wood comes out as dust or if the hole is elongated, the hinge is not securely anchored.
Repairing Damaged Wood Before Reinforcement
If you find minor rot or soft spots, you have two options:
- Epoxy wood consolidant: For localized rot, a liquid epoxy consolidant can be brushed onto the damaged area. It penetrates the wood fibers and hardens, restoring structural integrity. This is a temporary fix, but it can buy you a few years.
- Sectional replacement: For larger areas of rot, the damaged section of the jamb should be cut out and replaced with a new piece of solid wood. This is a more involved repair, but it is the only permanent solution.
If the rot is extensive, for example, the entire bottom 12 inches of the jamb is soft, the entire jamb may need to be replaced. This is a bigger project, but it is a necessary prerequisite for any security hardware. Installing a reinforcement kit on a rotted jamb is like putting a new lock on a cardboard box; the hardware will hold, but the surrounding material will fail.
Conclusion: Build a Real Defense Against Kick-Ins
Preventing forced entry on wooden doors requires understanding that the frame, not the door, is the weak point. Upgrading your strike plate with long screws is a solid first step, but a complete defense covers the lock, hinges, and jamb together.
Door Armor has secured over 500,000 doors with a system that is police-tested and recommended, backed by a $500 Lifetime Guarantee. The patented galvanized steel design installs in under 30 minutes and provides the critical time you need to react during an attempted break-in. Get started with Door Armor and turn your wooden door into a real barrier against forced entry.
Frequently Asked Questions
What are the best ways to protect a door against forced entry?
The most effective approach targets the frame, not just the lock. A standard deadbolt is only as strong as the strike plate and jamb it locks into. Reinforce the strike plate with 3 to 4 inch screws that reach the wall stud, install a door frame reinforcement kit like Door Armor, and consider a door brace for added security. These mechanical upgrades provide the strongest resistance against kick-ins and prying.
Are strike plates effective at stopping forced entry?
A standard strike plate is not very effective. They are typically held in place by short half-inch screws that only penetrate the soft wood of the door jamb, which can splinter under force. Door strike plate reinforcement, using a heavier gauge metal plate and long screws that anchor into the wall's structural stud, is highly effective. This simple change significantly increases kick-in resistance and is a core component of any door security upgrade.
How can I reinforce a wooden door frame to prevent kick-ins?
To reinforce a wooden door frame, you must address its weak points: the strike plate area, the hinges, and the jamb itself. Replace short screws with long 3 to 4 inch screws in both the strike plate and hinge plates to tie the frame to the wall studs. For comprehensive protection, install a system like Door Armor, which uses galvanized steel shields to cover the jamb, hinges, and lock area, distributing force across the entire structure.
Do door jammers or security bars actually prevent forced entry?
Yes, door jammers and security bars are effective deterrents because they physically block the door from being opened, even if the lock or strike plate fails. They work by creating a rigid brace between the door and the floor. However, they are only usable when you are home. For 24/7 protection, a permanent solution that reinforces the frame and lock mechanism is a better investment for preventing forced entry on wooden doors.
What is the best door lock for a wooden door?
A Grade 1 deadbolt is the best lock for an exterior wooden door. However, the lock is only one part of the security equation. The lock's bolt is useless if the strike plate and jamb are weak. For true security, the deadbolt must be paired with a reinforced strike plate and a door frame reinforcement system. This combination ensures the entire locking mechanism works as a single, unified barrier against forced entry.
How long does it take to install a door reinforcement kit?
Most high-quality door reinforcement kits are designed for simple DIY installation. A system like Door Armor is designed to be installed in under 30 minutes. You only need a power drill and a screwdriver, and the kit includes all necessary hardware and templates. This makes it a practical weekend project for most homeowners, unlike installing a new door, which requires more skill and time.