 how-to
How Long Does Door Reinforcement Installation Take?
Table of Contents
- What Determines Door Reinforcement Kit Installation Time
- Tools Needed for Door Reinforcement: What to Have Ready
- How to Reinforce Front Door Frame: Step-by-Step Timing
- DIY vs. Professional Installation: Time and Cost Trade-Offs
- Common Installation Mistakes That Add Time
- Post-Installation Testing: Confirming Your Door Is Secure
- Frequently Asked Questions
Last Updated: September 25, 2026
What Determines Door Reinforcement Kit Installation Time
Most homeowners finish a door reinforcement installation in 30 to 45 minutes. That number holds up across thousands of installs, but it only applies when the door and frame are in decent shape. A warped frame or stripped screw holes can double the job.
Here's the part most guides skip: the clock doesn't start when you pick up the drill. It starts when you kneel down and actually look at your door. Prep work is where installs go fast or fall apart. At Door Armor, we've watched this play out on more than 500,000 doors, and the pattern is always the same. The people who measure twice finish in half the time.
So what actually moves the needle? Two things: your door's material and the state of your existing hardware.
Door Material and Frame Condition
Solid wood frames take screws cleanly and hold them tight. That's the fast case, usually 30 minutes flat. Hollow metal frames need different fasteners and a lighter touch with the drill, which adds 10 to 15 minutes.
Older homes are the wild card. Original trim, layers of paint, and a frame that's shifted over decades all slow you down. A common mistake is forcing a strike plate into a frame that isn't square. You'll spend 20 minutes fighting it and still end up with a gap.
Check these before you start:
- Is the frame square? Close the door and look for light gaps.
- Are the screw holes stripped? Stick a screwdriver in and wiggle it.
- Does the door stick or rub? That signals a settling frame.
- Is the trim original or replaced? Newer trim is usually easier to work with.
Existing Hardware and Alignment
Your current deadbolt and hinges set the pace for the whole job. If the door already closes cleanly and the deadbolt throws without resistance, you're in the fast lane.
Misalignment is the silent time killer. A door that rubs the frame means every plate you install needs shimming and adjusting. That's easily an extra 15 minutes you didn't plan for.
What most guides miss is that smart lock integration changes the equation too. If you're keeping your existing smart lock, you need to confirm the reinforcement plates clear the lock body before you drill anything. Measure that gap first.
Tools Needed for Door Reinforcement: What to Have Ready
Gathering your tools before you start saves more time than any technique. A power drill, the right drill bits, and a level cover 90% of the job. The rest is small stuff you probably already own.
Here's your checklist:
- Power drill with a charged battery
- Drill bits sized to your screws (usually 1/8 inch for pilot holes)
- Wood screws, 3 inches long, for deep frame anchoring
- A level, to confirm the strike plate sits straight
- A pencil, for marking pilot holes
- A screwdriver for final tightening
- Safety glasses
The tools needed for door reinforcement aren't exotic. You don't need a contractor's van. But cheap drill bits will cost you time, so use sharp ones.
How to Reinforce Front Door Frame: Step-by-Step Timing
The full process runs about 30 minutes when nothing goes wrong. But "nothing goes wrong" depends heavily on what your door is made of. Here's how to reinforce a front door frame, broken into timed stages, with the material-specific variance most guides leave out.
Time by Door Material
Before you start the clock, know which category you're in:
| Door Type | Typical Total Time | Why |
|---|---|---|
| Solid wood frame | 25-30 min | Screws bite cleanly, minimal shimming |
| Hollow-core door | 30-40 min | |
| Solid metal frame | 35-50 min | |
| Older home, settled frame | 45-60+ min | Out-of-square jamb forces shimming and re-drilling |
If you're not sure what you have, tap the jamb with a screwdriver handle. A dull thud means solid wood.
Step 1: Prep and Mark (5 Minutes)
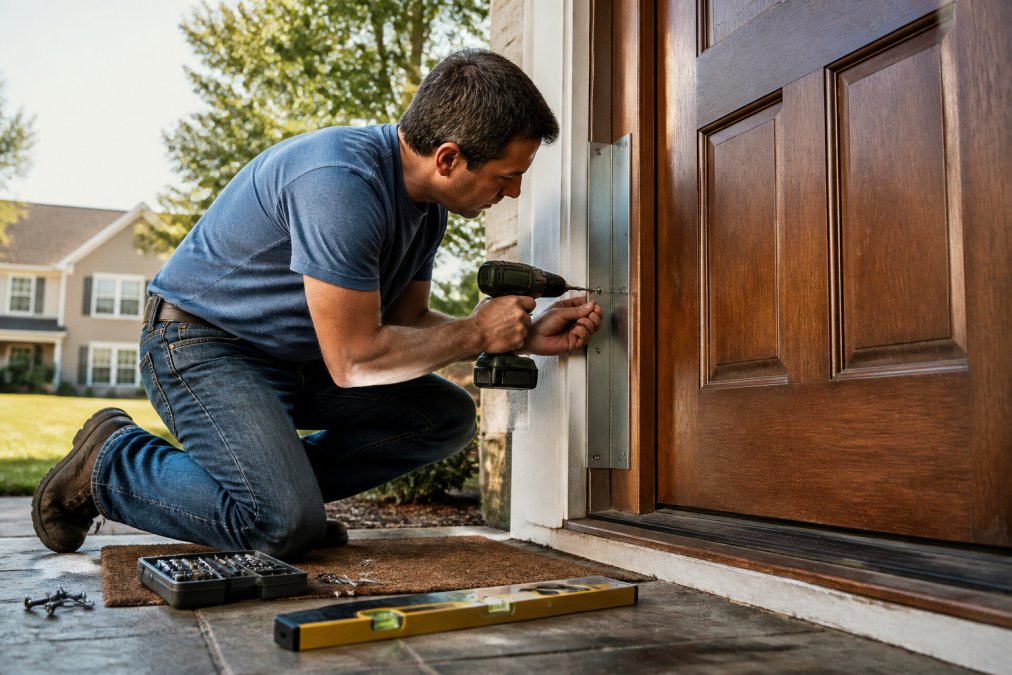
Clean the frame and mark your hardware positions. Wipe away dust and old paint flakes so your plates sit flush. Then hold each piece against the frame and trace the screw holes with a pencil.
This is where prep work pays off. Take the full 5 minutes. Rushed marking leads to crooked plates, and crooked plates mean redrilling.
Door Armor Single Door Security Set →
Step 2: Drill Pilot Holes and Install Hardware (15 Minutes)
Drill your pilot holes, then drive the screws. Start with the jamb reinforcement plate, then move to the strike plate and hinge shields. Keep the drill steady and let the bit do the work.
Seat each screw snug, not crushing. Over-tightening strips the hole, which is the most common way a 15-minute step turns into 30.
Step 3: Test and Adjust (10 Minutes)
Close the door and check the fit. The deadbolt should throw smoothly. The door shouldn't rub. If something binds, loosen the plate, shim it, and retighten.
This step is not optional. Testing now catches problems while they're still a two-minute fix.
| Step | Time | What You Do | Watch For |
|---|---|---|---|
| Prep and mark | 5 min | Clean frame, trace holes | Crooked marks |
| Drill and install | 15 min | Pilot holes, drive screws | Stripped holes |
| Test and adjust | 10 min | Close door, check fit | Binding, gaps |
Troubleshooting: When the Install Fights Back
Most guides stop at the happy path. Here's what to do when it doesn't go smoothly, and how much time each fix adds.
Strike plate won't align with the deadbolt. Loosen the plate screws a quarter turn, shift the plate until the bolt throws freely, then retighten. If the misalignment is more than 1/8 inch, you may need to chisel out a small amount of jamb material behind the plate. Budget 5-10 extra minutes.
Screw spins without tightening (stripped hole). Remove the screw. Push a wooden golf tee or a few wooden toothpicks coated in wood glue into the hole, snap them flush, and let the glue set for 10 minutes. Re-drill a pilot hole and drive the screw again. This adds 15 minutes but saves the jamb.
Pilot hole is too small and the screw binds. Back the screw out, step up one drill bit size, and re-drill.
DIY vs. Professional Installation: Time and Cost Trade-Offs
For most homeowners, DIY wins. A door reinforcement kit installs with basic tools, and the process is forgiving. Hiring a handyman or contractor adds scheduling time and labor cost on top of the kit itself.
When does professional installation make sense?
- Your frame is damaged or badly out of square
- You're not comfortable with a power drill
- The door is a custom or antique build you don't want to risk
Common Installation Mistakes That Add Time
The fastest way to blow past 30 minutes is to skip the basics. But knowing the mistake isn't enough, you need to know how to recover when it happens. Here's each mistake, the time it costs, and the fix.
Every minute you save by rushing prep costs you two later. Measure, mark, and pre-drill. And when something does go wrong, fix it immediately, a stripped screw or misaligned plate only gets harder to correct once the door is back in daily use.
Post-Installation Testing: Confirming Your Door Is Secure
Testing is the step everyone skips, and it's the one that matters. A reinforcement kit only works if every piece engages when the door closes. You need to confirm that before you call the job done.
Run this checklist after install:
- Close the door and listen for rubbing or scraping
- Throw the deadbolt and confirm it seats fully
- Push the door from outside to check for play
- Open and close the door five times to check the hardware holds
- Check that hinge shields sit flush with the jamb
- Confirm the frame shows no new cracks around the screws
- Test your smart lock if you kept one
Frequently Asked Questions
How long does it take to install a door reinforcement kit?
Most door reinforcement kits install in about 30 minutes for a single door. Door Armor's system is designed for DIY installation in under 30 minutes. Time varies with door material, frame condition, and whether you need to adjust alignment. If your door frame has existing damage or misalignment, plan for 45 to 60 minutes.
What tools are needed for door reinforcement installation?
You need a power drill, drill bits (including a 1/8-inch pilot bit), a screwdriver, a tape measure, a pencil, and a level. A hammer may help with tapping shims. A stud finder is optional but useful for locating solid framing behind the jamb.
Can a homeowner install door reinforcement without professional help?
Yes. Door reinforcement kits are designed for DIY installation. Door Armor's kit requires only basic tools and no special skills. The process involves marking, drilling pilot holes, and driving screws. If you can hang a picture frame, you can install a reinforcement kit. Professional installation is only necessary if your door frame is severely damaged or misaligned.
How do I reinforce my front door frame without replacing the door?
You can reinforce the front door frame by installing a strike plate reinforcement kit and hinge shields. These steel plates attach to the existing jamb and studs, adding force resistance without removing the door. Door Armor's Single Door Security Set installs over your current hardware and matches your door's finish. This takes about 30 minutes and requires only a drill and screwdriver.