 how-to
Can I Remove Door Security Later? Yes, Here's How
Table of Contents
- Can I Remove Door Security Later? The Short Answer
- What You'll Need to Remove Door Security Hardware
- Step-by-Step: How to Remove Door Security Later
- How to Secure a Rental Door Without Drilling
- Best Door Security for Renters: Reversible Options
- Security Deposit and Door Modifications: A Legal Checklist
- Restoring Your Door to Original Condition
- First: Identify Whether Your Security Device Was Permanent or Removable
- Step 1: Assess the Screw Holes You Actually Left Behind
- Step 2: Match the Filler to the Finish
- Step 3: Color Matching Without Guessing
- Step 4: The Reversibility Documentation Template
- Step 5: Hardware Compatibility for Reinstallation
- Final Restoration Check
- Final Check: Documentation and Hardware Compatibility
- Frequently Asked Questions
Last Updated: September 4, 2026
Can I Remove Door Security Later? The Short Answer
Yes, you can remove door security later, and most quality systems are designed with this scenario in mind. Removal is straightforward if you chose the right products and installed them correctly.
The critical distinction is between permanent alterations and reversible installations. Drilling new holes into the door frame or replacing the jamb is a permanent modification. Surface-mounted locks and reinforcement kits that use existing screw holes are fully reversible. Understanding this difference before you install anything saves you significant hassle later.
What You'll Need to Remove Door Security Hardware
Before starting, gather the right tools to avoid damaging the door or hardware.
- Screwdrivers: A Phillips head and a flat head screwdriver in various sizes. Many security plates use tamper-resistant heads, so check the fastener type first.
- Drill and drill bits: For stubborn screws that have seized, a drill with a reverse function is essential.
- Hacksaw or angle grinder: For cutting through a deadbolt or a jimmy proof lock if the key is lost and the lock is seized.
- Metal file: To smooth any rough edges left on the door frame after removing brackets.
- Wood filler and touch-up paint: To patch and conceal any minor screw holes that were drilled into the frame.
Step-by-Step: How to Remove Door Security Later
The removal process mirrors the installation in reverse, but it requires more patience because fasteners often seize over time.
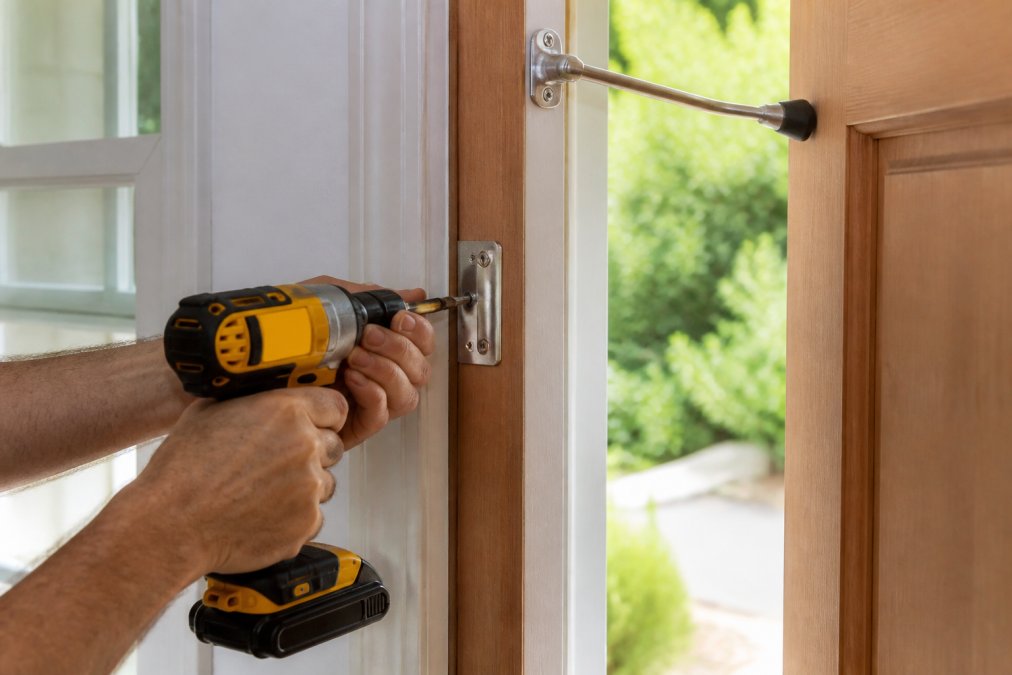
Step 1: Removing Surface-Mounted Locks and Bars
Surface-mounted options, like swing bar locks or slide bolts, are the easiest to remove. Remove the screws holding the bracket. If attached with carriage bolts, hold the nut on the interior side with a wrench while turning the screw head on the exterior. Once fasteners are out, the hardware should lift cleanly away.
Step 2: Taking Out Screws and Mounting Brackets
After removing the main lock body, you are left with mounting brackets secured with longer screws. Remove these slowly. If a screw feels tight, stop and check whether it is turning the anchor in the frame rather than backing out.
Step 3: Dealing with Stuck Screws or Locks
Stuck screws are the most common obstacle. If a screw will not budge, apply penetrating oil and let it sit for ten minutes. For a seized lock cylinder where you have lost the key, drill out the cylinder core, insert a flat head screwdriver, and turn counterclockwise to retract the bolt. If the bolt remains stuck, a hacksaw can cut through it, but this is a last resort because it will damage the strike plate.
How to Secure a Rental Door Without Drilling
If you are a renter, the rule is simple: use hardware that does not require new holes. Many renters assume they must choose between their security deposit and their safety. That trade-off is false.
- Door jamb reinforcement plates: These use the existing screws in your strike plate area, replacing the short factory screws with longer ones that reach the stud.
- Portable door locks: These slide under the door knob and require no tools, but they only work when you are inside.
- Adjustable security bars: These wedge under the door handle and press against the floor, providing a physical barrier against forced entry.
The most effective renter-friendly approach is upgrading existing hardware. Reinforcement systems like Door Armor are discreet and match your current hardware, reinforcing weak points rather than adding bulky external bars.
Best Door Security for Renters: Reversible Options
Choosing the best door security for renters comes down to a trade-off between protection level and reversibility. Here is a summary of the options that balance both:
| Security Option | Installation | Removal Difficulty | Protection Level | Best For |
|---|---|---|---|---|
| Longer strike plate screws | Low (uses existing holes) | Very Low | Moderate | Reinforcing entry points |
| Surface-mounted slide bolt | Low (new holes) | Low | Moderate | Apartments with solid frames |
| Door jamb reinforcement kit | Medium (replaces strike plate) | Low | High | Renters wanting real kick-in protection |
| Portable wedge lock | None | None | Low | Travel and temporary use |
A door jamb reinforcement kit, such as the Door Armor Single Door Security Set, is the strongest reversible option. It replaces the existing strike plate and uses original screw holes where possible. Installation takes about 30 minutes; when you move out, swap the original strike plate back in and fill the two or three new screw holes with wood filler.
Security Deposit and Door Modifications: A Legal Checklist
Whether you can remove door security later is often tied to whether you can modify the door in the first place. In most rental situations, the law distinguishes between "fixtures" and "personal property." A surface-mounted lock screwed into the door is generally a temporary alteration, not a fixture, provided you restore the door to its original condition.
Step 1: Locate the Three Lease Clauses That Matter
Before installing anything, pull out your lease and search for these terms.
- "Alterations" or "Improvements" clause: This is the primary gatekeeper. It often reads like "Tenant shall not make any alterations, additions, or improvements without prior written consent of Landlord." If your lease contains this language, any screw hole you drill is technically an alteration. Some leases exempt "temporary fixtures" or "readily removable items", if that exemption exists, surface-mounted hardware is likely fine.
- "Locks" or "Security Devices" clause: Many leases specifically govern changes to locks. Some require that the landlord receive a copy of any new key. Others outright prohibit tenant-installed deadbolts. If your lease is silent on locks, state law generally allows tenants to install reasonable security devices, but you must provide keys to the landlord upon request.
- "Restoration" or "Surrender" clause: This dictates the condition you must return the unit in. Standard language requires the unit be "broom-clean" and free of damage beyond normal wear and tear. The key legal question is whether screw holes from a surface-mounted security plate count as "damage" or "normal wear and tear." Most state landlord-tenant codes, including those modeled on the Uniform Residential Landlord and Tenant Act, treat small holes from picture hanging or removable hardware as normal wear, not damage, provided they are patched.
Step 2: Document Before You Drill
Create a dated, timestamped photo record of the door, frame, and strike plate area before installation. Use a ruler in the frame for scale. This baseline documentation is your primary evidence if a dispute arises.
Step 3: Get Written Permission, Even If You Think You Don't Need It
If your lease has an alterations clause, send a short email to your landlord before installing anything. A workable template:
Subject: Request for approval, temporary door security hardware
Hi [Landlord],
I would like to install a surface-mounted door reinforcement plate on the entry door. The hardware is fully reversible, it replaces the existing strike plate and uses the current screw holes where possible. On move-out, I will restore the original strike plate and patch any new screw holes with wood filler. I have attached photos of the current door condition. Please reply to confirm this is acceptable.
Thanks, [Your name]
Step 4: Create a Reversibility Documentation Packet
Before removing hardware at move-out, assemble a packet proving the installation was temporary and reversible. Include:
- The original photos from Step 2.
- A dated photo of the hardware installed.
- A dated photo of the hardware removed and the original strike plate reinstalled.
- A photo of the patched and painted screw holes.
- A copy of the landlord's written approval email.
Print this packet or email it to the landlord on the day you return the keys. This proactive documentation shifts the burden of proof.
Step 5: Know the Distinction Between Repair and Replacement
If you drilled holes larger than 1/4 inch or removed material from the frame, you may need more than wood filler. For holes up to 1/4 inch, standard wood filler is adequate. For larger holes, use a two-part wood epoxy that hardens and sands flush. If you damaged the frame's structural integrity, for example, by splitting the jamb, repair it properly or expect a deduction.
State Law Note
While lease language governs most situations, some states have specific statutes on tenant security devices. For example, California Civil Code Section 1941.3 requires landlords to maintain operable deadbolts on exterior doors, and tenants have the right to install additional security devices, but they must notify the landlord and provide keys. Other states, such as Texas, have similar provisions under the Property Code. Check your state's landlord-tenant statute for the phrase "security device" to understand your baseline rights.
Restoring Your Door to Original Condition
Once the hardware is off, the door frame will have visible marks. A reinforcement plate covers the strike area, so you will likely have screw holes in the jamb and possibly on the door edge. Restoration involves three steps: filling, sanding, and painting.
First: Identify Whether Your Security Device Was Permanent or Removable
Before patching holes, assess what you installed. This determines your restoration strategy.
- Surface-mounted hardware (removable): This includes swing bar locks, slide bolts, and reinforcement plates that attach with screws to the door face and frame. These leave only screw holes. Restoration is straightforward: fill, sand, paint.
- Through-bolted hardware (semi-permanent): Some high-security locks use carriage bolts that pass completely through the door. When you remove these, you are left with holes on both the interior and exterior faces. These require a more substantial repair, often a dowel plug glued into the hole, sanded flush, then painted.
- Welded or epoxied hardware (permanent): If a security bar was welded to a steel frame or epoxied into a mortise, removal is destructive. You will need to grind welds, patch the frame with metal filler, and repaint the entire jamb. This is no longer a DIY restoration, it is a repair that may require a professional. If you installed this type of hardware in a rental, you likely violated your lease and may face a significant deposit deduction.
Step 1: Assess the Screw Holes You Actually Left Behind
Not all screw holes are equal. A #8 wood screw leaves a hole roughly 1/8 inch in diameter, while a #12 screw, common in security plates, leaves a hole closer to 3/16 inch. Depth also matters, screws that bit into the stud leave deeper holes than those that only penetrated the jamb. For shallow holes under 1/2 inch deep, standard wood filler is sufficient. For deeper holes that reach the stud cavity, pack the hole with a wooden dowel coated in wood glue before filling.
Step 2: Match the Filler to the Finish
- Painted frames: Use a latex wood filler that dries sandable. Apply with a putty knife, overfilling slightly. Let it dry completely, typically 2 to 4 hours depending on humidity. Sand flush with 120-grit sandpaper, then follow with 220-grit for a smooth finish.
- Stained frames: Standard wood filler will stand out as a light patch. Use a stainable wood putty that matches the frame's tone. Apply, sand, then apply a matching stain pen or gel stain. For oak frames, use an oak-tinted putty. For maple or pine, choose a neutral tone and blend.
- Metal frames: If your security hardware was mounted on a steel door frame, use a two-part automotive body filler. Sand with 80-grit, then 220-grit, and prime before painting to prevent rust.
Step 3: Color Matching Without Guessing
Do not guess the paint color. Cut a 1-inch square chip from an inconspicuous area, the top edge of the door or inside of the jamb, and take it to a hardware store for spectrophotometer color matching. This gives you custom-matched paint in a sample jar for under $10. Apply with a small foam brush, feathering edges into surrounding paint.
Step 4: The Reversibility Documentation Template
Before restoration, create a dated photo log. Take a photo of the bare frame with hardware removed, then after filling, then after painting. Label each with the date and time.
When you hand the keys back, present the landlord with a one-page summary that includes:
- The original door condition photo (before installation)
- The hardware installed photo
- The hardware removed photo
- The final restored photo
- A note stating: "All hardware was surface-mounted and removed without structural damage. Screw holes were filled and painted to match. The door is returned in its original condition."
This documentation transforms a subjective dispute into an objective record. Property managers are far less likely to deduct from a deposit when presented with a clean, dated photo trail.
Step 5: Hardware Compatibility for Reinstallation
If you plan to reinstall the security system at your new residence, check compatibility before you pack it. Not all doors are the same thickness, and not all frames have the same clearance. The Door Armor system is designed for exterior doors up to 1-3/4 inches thick, and kits are specific to door types like single doors, double doors, and side light doors. Measure your new door's thickness with a caliper and check the frame's backset, the distance from the door edge to the center of the bore hole. Standard backsets are 2-3/8 inches or 2-3/4 inches.
Final Restoration Check
After the filler dries and paint cures, run your hand over the patched area. It should be smooth and flush with no visible depression. Close the door and check that the latch engages cleanly in the original strike plate. If the door sticks or the latch scrapes, the frame may have shifted during removal, a rare issue requiring shimming the strike plate or planing the door edge. In that case, call a professional.
Final Check: Documentation and Hardware Compatibility
Before handing keys back to the landlord, perform a final inspection. Verify that every component has been accounted for. Check the hinge pins and confirm the door swings freely without scraping the frame.
Hardware compatibility matters if you plan to reinstall the security system at your new residence. Not all doors are the same thickness, and not all frames have the same clearance. The Door Armor system is designed for exterior doors up to 1-3/4 inches thick, and kits are specific to door types like single doors, double doors, and side light doors. If moving, check your new door's dimensions against the manufacturer's specifications before assuming the hardware will transfer.
Lastly, keep your documentation. Store receipts for the security system, photos of the original door condition, and any written correspondence with your landlord. If a dispute arises over the security deposit, this documentation is your evidence that the door was restored.
Removing door security later is a simple process when you plan for it at installation time. The challenge is balancing strong protection with the need to restore the property later. Door Armor solves this with a patented galvanized steel system that reinforces your existing door without turning your home into a fortress. The $500 Lifetime Guarantee against kick-ins and the 30-minute DIY installation make it a practical choice for renters and homeowners alike. Get started with Door Armor and secure your door today, knowing you can remove it cleanly when the time comes.
Frequently Asked Questions
Will removing a door security system damage my door frame?
If you installed the system with screws, removal leaves small holes that are easy to fill with wood filler and touch-up paint. For screw-mounted systems, filling and sanding the holes before repainting returns the frame to its original condition. This process helps keep your security deposit intact.
Can I legally remove security upgrades I installed in a rental?
Yes, you can remove security devices you installed yourself, provided you restore the property to its original condition. This is where your lease agreement and tenant rights come in. Check your lease for any clauses about property alteration. Document the installation with photos and keep receipts. When you move out, fill any screw holes and repaint. This protects you from security deposit deductions.
What is the best way to reinforce a door without permanent modifications?
For renters, door security options that use temporary installation methods are ideal. Look for systems that mount with screws into areas that are easy to patch. A reinforcement kit that attaches to the existing strike plate can provide significant protection. These options are designed for easy removal, leaving behind only small, fillable holes.
How do I remove a portable door lock or security bar?
Portable door locks and security bars are designed for quick removal. A door jammer is typically engaged by sliding a foot under the door; you simply pull it out and store it. A portable lock that fits into the existing strike plate usually has a release button or tab. Lift the device out of the plate and store it. These tools leave no marks and require no tools for removal.
This article was written using GrandRanker
Frequently Asked Questions
Q: Will removing a door security system damage my door frame?
A: If you installed the system with screws, removal leaves small holes that are easy to fill with wood filler and touch-up paint. For screw-mounted systems, filling and sanding the holes before repainting returns the frame to its original condition. This process helps keep your security deposit intact.
Q: Can I legally remove security upgrades I installed in a rental?
A: Yes, you can remove security devices you installed yourself, provided you restore the property to its original condition. This is where your lease agreement and tenant rights come in. Check your lease for any clauses about property alteration. Document the installation with photos and keep receipts. When you move out, fill any screw holes and repaint. This protects you from security deposit deductions.
Q: What is the best way to reinforce a door without permanent modifications?
A: For renters, door security options that use temporary installation methods are ideal. Look for systems that mount with screws into areas that are easy to patch. A reinforcement kit that attaches to the existing strike plate can provide significant protection. These options are designed for easy removal, leaving behind only small, fillable holes.
Q: How do I remove a portable door lock or security bar?
A: Portable door locks and security bars are designed for quick removal. A door jammer is typically engaged by sliding a foot under the door; you simply pull it out and store it. A portable lock that fits into the existing strike plate usually has a release button or tab. Lift the device out of the plate and store it. These tools leave no marks and require no tools for removal.